Pages

Showing posts with label recipe. Show all posts

Friday, January 14, 2011

A Mischief of Mice

The holidays aren't complete without a visit of the mice.
(Some assembly required of course)
Please don't forget the ears!
the huddle
'the soap opera'
'the choir'

Lovely young mice, slightly crunchy, watch out for the red juice, delicious and fun!

Happy creating to you and yours,
-Carmen Rose

Friday, July 2, 2010

Pizza on the Grill & Recipe

I recently saw an episode of Alton Brown's "Good Eats" where he grilled pizza.  I knew I had to try it.  He used a pretty specific pizza dough recipe but hubs just whipped up a batch of pizza dough in the bread machine, same formula we usually use. 

Recipe: 
1 1/4 cup warm water
2 cups white flour
1 cup wheat flour
2 T sugar
1/2 t salt
1 1/2 t yeast
2 T oil

Place the ingredients in the bread machine in this order, put it on the dough setting.  Watch it to make sure that it mixes everything together properly.   (Course you can just go pick up a ball of ready made pizza dough at Wally's for 99 cents.)

After the machine was finished with the dough, I took it out, divided it and worked it into two balls and let them raise on the counter under a towel.  Then I stretched them out into pizza shapes.  I preheated the grill and put some olive oil on a paper towel to wipe the grill.  I used a bit of cornmeal between the dough and a cookie sheet so that it wouldn't stick and just slid the dough on to the hot grill.  I adjusted it a tiny bit once it was on, but for the most part the heat of the grill will start to make the dough into crust pretty quickly.

I poured on some olive oil and brushed it out into a nice even coat.  I flipped it over and while the fire was browning the other side, I put olive oil on the baked side and brushed it around to an even coat.  I put some garlic through the garlic press and tried to evenly distribute that over the surface, I followed that with thin sliced onions, peppers and fresh chopped basil.  Then some cheese, mozzarella and some extra sharp cheddar.  I had to work quickly because the fire was browning the other side of the crust in a hurry.   


Then I closed the lid for a bit for the cheese to get a chance to melt.  When I decided it was done, I slid my cookie sheet under it and took it off the fire.  I cut it with scissors and got a very satisfying sound of crunchy crust along with the melted stringy cheese.  Yum!

I'm looking pretty pleased with myself, I'll tell ya.. I hadn't tasted it at that point but I had certainly smelled it!  I helped myself to a slice while I started the second one - YUM!

Believe me, you want to have everything you need right there beside you because it doesn't take long to put this together and you don't want it to burn while you're running back to the kitchen to get the cheese.

The second one was more of a rectangle... a very ugly rectangle... but I added some pizza sauce (highly over rated) and pepperoni to this one.  It took a little longer for the cheese and pepperoni to warm so I ended up getting it a little dark on the under side.  Oops... but still yummy!

It had a very satisfying crunchy crust and the kiss of the flames had worked their magic on the flavors.  The crust cooks quickly and it can't be over loaded with toppings.  It's all about texture and flavors!  It was thin, crunchy and smokey... yum yum yum!

You have got to try this!!  Make sure to gather everything you need around you while the grill is heating.  Here's a list,
Hmmm... let me see:
Pizza dough.
Olive oil and a pastry brush to distribute it all over the crust.
Tongs for flipping the crust when it's half way done.
All the toppings, thin sliced veggies, pressed garlic, basil, good cheese, salt and pepper.
Cookie sheet or a pizza peel.
Scissors or pizza cutter.
Plates,and or napkins.
Something cold to drink.

Is there anything I missed? 

With the size of my grill and the size of the recipe of dough, next time I think I'll divide it into three instead of two.  That way maybe I can have two side by side on the grill and just do them one right after the other.  That may work to serve more people at once, can't you just see grilling up a bunch of these for guests?  I can, that would be FUN!

We may never make pizza indoors again.

Fire up the grill and let me know how it goes, ok? 
Yummm....

Savor the flavors,
-Carmen Rose

Monday, June 28, 2010

Secret Recipe Chocolate Cake

We celebrated a special event with a gathering of artist friends. It was a "carry in." I brought the cake.
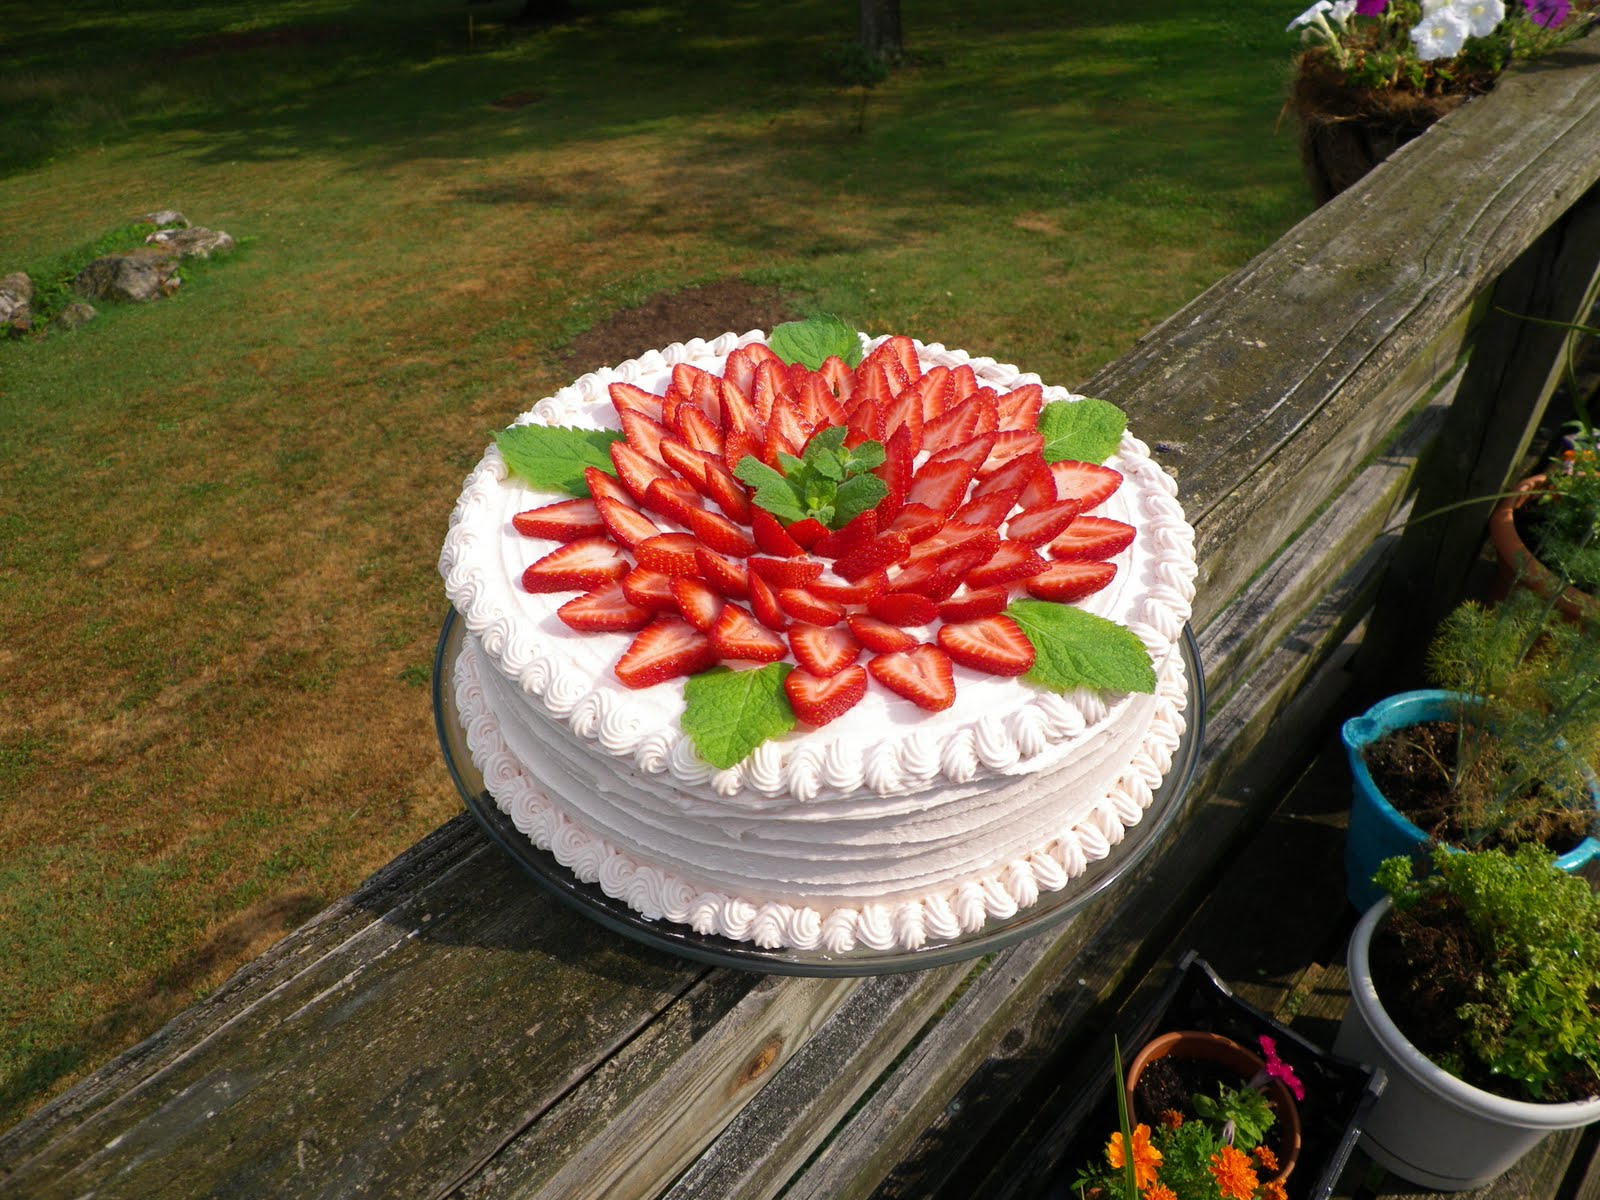
Chocolate cake, raspberry buttercream, strawberries and mint leaves.

Secret Recipe Chocolate Cake

Preheat oven to 350 degrees, and if your oven has one of those moving racks... either use a different rack or detach it so that it does not move. Moving a cake in the baking process can kill it.

1 Duncan Hines Devil's Food Cake Mix
1/2 cup canola oil
1/2 cup water (Or cold coffee if you like, I don't drink coffee so I use water.)
1/2 cup unsweetened applesauce
1 tsp vanilla
3 large yada yada eggs

(Yada yada eggs are the good ones that have fancy labels like "organic" or "free range" or "from happy chickens who listen to Mozart..." or simply from someone you've actually met who doesn't seem like the type that would be mean to critters... that sort of thing, you get the idea.)

Combine everything but the mix in a mixer and... uh... mix. Then add the mix and... well... uh... mix. Spray a 10 inch round cake pan with Baker's Joy.  (It has the flour and the shortening together in a one step spray.)  Put batter in pan and bake.

Most people over-bake cake, and dry cake = a waste of good calories.  So... here's how I tell if this cake is done.  I touch the surface of the cake.  If your finger comes back covered in batter... well... it's time to see if the oven is turned on.  If the surface jiggles and looks wet when you open the door, don't even touch it.  If it's starting to look baked and you touch the surface and you leave a finger print, it is not done.  As soon as you can touch the surface and it springs back... it's done.  Cake pulls away from the edges of the pan slightly as it bakes... the longer it bakes the more it shrinks.  You want to catch it just as that shrinking process starts.  Does the surface spring back?  Has it started to pull away from the edge?  Then it's done.  I should try the toothpick test, but I never remember.  Any longer and it will start to dry out.

Bring it out of the oven, put waxed paper over the top of the hot cake and then add a cutting board, a piece of cardboard... a plate... something... over that.  Put the cake pan with the waxed paper against the solid surface and FLIP the cake over.  A friend of mine baked lots of cakes, but she would leave them out on the counter to cool for hours and then wonder why they turned out so dry.  As soon as you can, remove the pan and wrap the warm cake in plastic wrap.  I've never had the plastic wrap actually melt into the cake and I'll wrap a steaming hot cake, so don't worry about that.  The plastic wrap and the waxed paper on the bottom are designed to seal in the moisture of the cake, try not to leave any bits of cake uncovered.


If you'll need to carve the cake or split layers for filling, or if you won't be using the cake until the following day, then place the cake in the freezer once it has cooled and been securely wrapped.  It's easy to carve a frozen cake, but very difficult (if not impossible) on fresh moist cake.  Cake is very sensitive to picking up freezer odors, so don't leave it in there indefinitely but overnight or till the weekend should be fine. 


Take the cake out of the freezer, carve if desired and ice immediately, even as the cake is still frozen.  Garnish and serve.  It thaws quickly and if you do this step just before a meal, it will just be chilly by the time you serve it, rather than frozen.


It's an easy recipe, and if you get it out of the oven at the right time, and keep it wrapped up tight until it's time for the icing... you should have an excellent moist chocolate cake.

Shhhh... this ultra easy little recipe has been my little secret for a long time!  Try it and let me know how it goes.

* * * * * * * * * * * * * * * * * * * *
Oh... I'm not sure if I should confess this or not... but it you like Whoopie Pies...
as I do... (And who doesn't like whoopie pies?!) Then simply line a cookie sheet with parchment and using tablespoons, make drop cookies with this recipe. Bake them at 350 degrees for about seven minutes.  Watch these close so they don't over bake. They should be cakey, not crispy.  Add whoopie pie filling or vanilla butter cream between two halves. (Some people use marshmallow fluff)  I leave some out and wrap the rest individually and freeze them. I love these, especially right from the freezer on a hot summer day.

Savor the Flavors,
Carmen Rose

Friday, January 15, 2010

Chocolate Cake

Last evening I tried an experiment. I’d heard a friend mention 5 minute microwave cake, they raved over how good it was. I was curious, I researched it a bit and found that this kind of thing gets a very mixed reviews. So I had to try it.


Here's the recipe if you'd like to try it: (serves two)
(But before you scamper off to get out your mug and reach for an egg... please FIRST read the rest of the post!)   =)

* * * * * * * * * *
5 MINUTE CHOCOLATE MUG CAKE

4 tablespoons flour
4 tablespoons sugar
2 tablespoons cocoa
1 egg
3 tablespoons milk
3 tablespoons oil
3 tablespoons chocolate chips (optional)
a small splash of vanilla extract
1 large coffee mug
Add dry ingredients to mug, and mix well. Add the egg and mix thoroughly. Pour in the milk and oil and mix well. Add the chocolate chips (if using) and vanilla extract, and mix again.
Put your mug in the microwave and cook for 3 minutes at 1000 watts. The cake will rise over the top of the mug, but don't be alarmed! Allow to cool a little, and tip out onto a plate if desired.
* * * * * * * * *

As an aside, my first business was one I started in college making wedding cakes for my friends. I am familiar with chocolate cake, and I may be a *tad* bit biased about what constitutes good cake. But I followed the recipe, and popped that thang in the mic. I used two mugs instead of one because I wasn’t going to eat the whole thing anyway. I watched it turning, and I started to catch the aroma of cooking cake. Hmmm… maybe this won’t be so bad, it smells good. I pulled it out, I wasn’t sure what to think of the appearance, so I popped it out on a plate and cut it open. It was done, no question about that. So how did it taste? It tasted exactly like you’d expect chocolate cake to taste that had been made in the microwave… it was… uh… rubbery. I figured I could get past the texture if the flavor was good, was it? Nope. Never again. Dang, how cool would it have been if it HAD been good?! Who doesn’t like the idea of a nice warm chocolate cake in 5 minutes and only dirtying a spoon and a mug?

I had a good friend over to Studio B today. We finished up a lovely lunch and I assessed the situation. Was that complete? Or did we need something yet? I looked at her and asked if she’d be interested in having molten chocolate cake?  We could make it together. She thought for a moment, I could see the wheels turning. And then she answered with a resounding “Yes!” I laughed with delight, some people are so afraid of good food that they won’t even try something if they think it’s loaded with calories. (Sometimes things that taste rich and decadent don't actually aren't all that loaded, it's just that everything is in balance - that's a mark of a great recipe in my opinion!)

And so we made chocolate molten cake. It didn’t take long to make, it took twelve minutes to bake. We added a little bit of peppermint ice cream…. and it was good! Well… I should say… it was excellent. There could not be more difference between the two chocolate cake experiences. It’s very different kind of cake than I would make for a wedding or special occasion cake, but it’s really really good.

So I ask you, why would anyone ever eat a cake that took five minutes to bake, when you could have this chocolate molten cake that took only seven additional minutes to bake? Because I’ll tell ya, they aren’t even in the same ballpark when it comes to flavor! Believe me, it is worth the wait!  (Can seven minutes reasonably be considered "a wait"?!)


And so... (Drum rollllllllllll)
I'm very pleased to present


(serves four)

And I made it with this baking chocolate... the stuff is HIGH TEST.

 
Seriously, there is a reason why dark chocolate is a super food
I try not to knock it.


And please allow me to point out that cake for cake... 
the molten chocolate recipe will have less calories.  
~ Think of it as health food. ~ 


Wishing you warm chocolaty goodness,
-Carmen Rose


PS WHY DIDN'T I TAKE PHOTOS?!
(Because for just a second there, living was more important than documenting.)

Friday, January 8, 2010

Green Chicken Stock

It's been cold here and we got about a half inch of snow last night.  It put me in the mood to have something simmering on the stove, so I decided to make green chicken stock and figure out what to do with it later on.

First off:  I fried up a pound of smoked bacon, drained off the bacon and set it aside for later use, keeping the fat.

I deglazed the pan with some red wine and then added an onion, a bunch of garlic, and all the green stuff: two jalapenos, a lime, and some herbs.  I didn't bother pealing any of that stuff, it all got strained off anyway.  I added soy sauce and some peppercorns to taste.  I added some water and let it all simmer for a while.

I opened up the chicken package and noticed a bad smell.  Ewww... I'd waited too long to use that one and had to throw away an entire chicken!  How vexing!  Note to self, use it or freeze it.  Sooo... off to the store for a replacement chicken.  (and chocolate, no point in going to the store for just one item after all!)  I charred it on the grill (the bird that is, not the chocolate) just for some added flavor.  

The I popped that bugga in the pot with the rest of the simmering green brew.  I'm pretty sure that's not the "right way" to do this, but it's my kitchen, I don't have to ask permission!  LOL!  Anyway, I think recipes are intended to inspire, not confine - at least in cooking.  In baking, following the directions is a good thing.  Adding enough water to cover the bird, I simmered it for a few hours.  It sure did make a flavorful green brew.

I pulled out the bird bits, separated the meat out and threw the rest back in.  I didn't have time to do much at that point, so I let it simmer a little longer.

I strained it all, threw away the bones and bits.  It's a dark potion with an earthy mellow yum.  Plus the house smells wonderful!

Tonight we had chicken, smashed taters and gravy, (gravy made with chicken stock) green beans with mushrooms, and fresh biscuits for supper.  I suppose it was all about the comfort food.  I would have taken a photo of my dinner plate but it didn't last long enough for that!

The rest of the chicken stock is in the fridge, tomorrow I shall skim off the fat and pack it away for another day when some liquid comfort is again needed. 

Happy Creating!
-Carmen Rose

Tuesday, December 22, 2009

I'm a fan of Ina Garten

I am a fan of food network, and while some of the hosts get on my last nerve, there are some that only get better the more I see them. Ina Garten is one of my favorites. And I love her kitchen. My brother is a fantastic kitchen designer, he has designed two kitchens for me now. Sadly, I don't live in either of those houses, but that's ok, our current house may be a work in progress, but we keep at it. This week my attention turns to our kitchen. We'll be removing our current floor and installing a new one, also... a coat of paint is in order... on Everything! And of course lots of details. So I'll keep you posted. And for inspiration here are some photos of Ina's kitchen. The first kitchen photo is her home kitchen, she also has "the barn" and there is one in New York that's very similar although if there is such a thing as "over the top" that would be it!


I like the open shelves! Perhaps when I paint my kitchen cabinets I'll just leave some of the doors off. I also love the details, like the candle sticks and the stools, they have nice lines. The rest of the room seems to be off the hook and the colors and style appeal to me but the scale does not. Too big! The pantry... I lurve the pantry! Everything is so NEAT! I really love order in my house. I told my hubby this evening that the way I packed my stuff into my current kitchen was crazy, I'm going to take it all out and start over! Well... not completely, but there are some changes that need to be made - and soon! It will come, we've only been in this house a year, it all just takes time.

PS, I've never really liked dressing at the holidays but Ina Garten won me over! I made an Ina Garten recipe (added a few things of course) for a Thanksgiving dinner party at my house. I made two at the same time and took the second one to a carry in meal at church and it did a lovely disappearing act! (Thankfully they let me take home my baking dish!) My parents decided that the dressing was the best they'd ever had (so I gave them the augmented recipe) and they served it to guests last week and again when we were at their house this evening. I had forgotten how good it was until I tasted it again this evening. It's her recipe, plus dried apricots, pecans and when it comes out of the oven I throw on a handful of green spring onions. The heat cooks the onion a bit between oven and table and the color and texture that it adds just takes the whole thing right over the edge. (And I actually didn't put any onion in the dressing because there would be plenty on top and in the gravy.) It was Yum! And suddenly our family has a new tradition, thank you Barefoot Contessa!
Related Posts with Thumbnails