 Press the star fabric open.
 Turn the section facedown and trim the points of the star leaving an extra .25 inch seam allowance.

 Holding fabric up to a light source, carefully trim the extra fabric away from the star leaving an extra .25 inch seam allowance. This will become a guide in sewing the next sections of the fabric to the star.
 You can just barely see the pencil mark through the fabric so that you know where to cut. Try to avoid using ink for this purpose, having the ink run when the finished quilt is washed would be rather annoying.
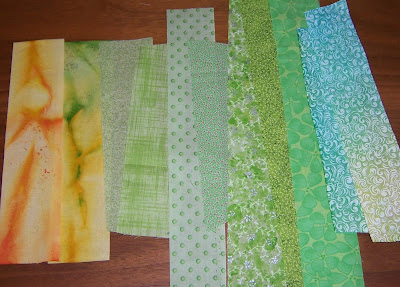
 Choose ten coordinating fabrics for the second row of the star and cut 2 inch strips or strips of various widths for a more funky look. Choose fabrics one step darker in value than the color of the star.
 Lay out the fabrics until you are satisfied with the colors and balance.
 Carefully place the chosen colors on the star face down, sew leaving a .25 seam allowance.
 Sew each star point starting on the right hand side so that all points of the stars “go” the same direction.
 Iron fabric open and trim.
 Place the second strip of fabric against the first, carefully sew and iron open then trim.
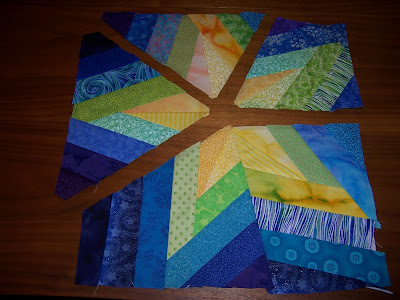
 Continue to add rows to the star points until all the backing fabric is covered. Iron each section open and trim each section carefully.


 Carefully sew two points of the star together matching the lining fabric and iron.
 Carefully sew two other points of the star together, matching the lining fabric and iron.
 And the final point to a pair and iron.
 Sew the final two sections together starting in the center of the star and sewing each side to the edge and iron.
 Your star is complete and ready to be trimmed. Add a border fabric or two, or piece several stars together in a quilt design. The options for using this star block in quilt designs are endless.

I have to admit, making a tutorial is kind of fun!


Too Cool! Thanks so much. I'm gonna try it!!!
ReplyDeleteWow - very comprehensive tutorial - and I love your fabric choices. Thank you for sharing your knowledge!
ReplyDeleteLeslie
Thanks! And if you make one, let me know! I'd like to see what you do! :) Post a photo online somewhere and then link here so we can pop over and see it!
ReplyDeleteThe brilliant blue you added in the end was just perfect to make this star pop. I love stars. Most of the quilts I made before doing the pictorials were always stars. I just may use this one for a small quilt to cozy up with.
ReplyDelete